


Hello Vulkan Window Example▲
The Hello Vulkan Window Example shows the basics of using https:// in order to display rendering with the Vulkan graphics API on systems that support this.
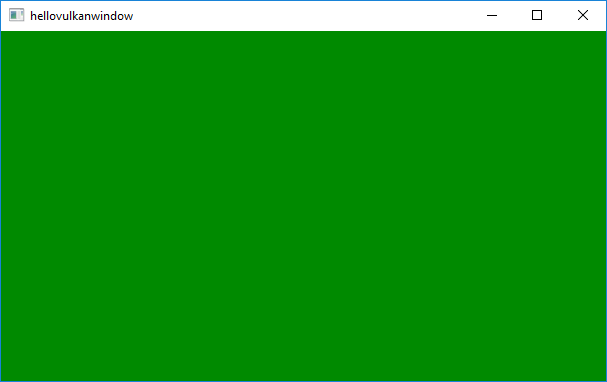
In this example there will be no actual rendering: it simply begins and ends a render pass, which results in clearing the buffers to a fixed value. The color buffer clear value changes on every frame.
Startup▲
Each Qt application using Vulkan will have to have a Vulkan instance which encapsulates application-level state and initializes a Vulkan library.
A https:// must always be associated with a https:// and hence the example performs instance creation before the window. The https:// object must also outlive the window.
    QVulkanInstance inst;

#ifndef Q_OS_ANDROID
    inst.setLayers(QByteArrayList() << "VK_LAYER_LUNARG_standard_validation");
#else
    inst.setLayers(QByteArrayList()
                   << "VK_LAYER_GOOGLE_threading"
                   << "VK_LAYER_LUNARG_parameter_validation"
                   << "VK_LAYER_LUNARG_object_tracker"
                   << "VK_LAYER_LUNARG_core_validation"
                   << "VK_LAYER_LUNARG_image"
                   << "VK_LAYER_LUNARG_swapchain"
                   << "VK_LAYER_GOOGLE_unique_objects");
#endif

    if (!inst.create())
        qFatal("Failed to create Vulkan instance: %d", inst.errorCode());
The example enables validation layers, when supported. When the requested layers are not present, the request will be ignored. Additional layers and extensions can be enabled in a similar manner.
    VulkanWindow w;
    w.setVulkanInstance(&inst);

    w.resize(1024, 768);
    w.show();
Once the instance is ready, it is time to create a window. Note that w lives on the stack and is declared after inst.
The QVulkanWindow Subclass▲
To add custom functionality to a https://, subclassing is used. This follows the existing patterns from https:// and https://. However, https:// utilizes a separate https:// object. This resembles https://, and allows better separation of the functions that are supposed to be reimplemented.
class VulkanRenderer : public QVulkanWindowRenderer
{
public:
    VulkanRenderer(QVulkanWindow *w);

    void initResources() override;
    void initSwapChainResources() override;
    void releaseSwapChainResources() override;
    void releaseResources() override;

    void startNextFrame() override;

private:
    QVulkanWindow *m_window;
    QVulkanDeviceFunctions *m_devFuncs;
    float m_green = 0;
};

class VulkanWindow : public QVulkanWindow
{
public:
    QVulkanWindowRenderer *createRenderer() override;
};
The https:// subclass reimplements the factory function https://(). This simply returns a new instance of the https:// subclass. In order to be able to access various Vulkan resources via the window object, a pointer to the window is passed and stored via the constructor.
QVulkanWindowRenderer *VulkanWindow::createRenderer()
{
    return new VulkanRenderer(this);
}

VulkanRenderer::VulkanRenderer(QVulkanWindow *w)
    : m_window(w)
{
}
Graphics resource creation and destruction is typically done in one of the init - resource functions.
void VulkanRenderer::initResources()
{
    qDebug("initResources");

    m_devFuncs = m_window->vulkanInstance()->deviceFunctions(m_window->device());
}
The Actual Rendering▲
https:// subclasses queue their draw calls in their reimplementation of QVulkanWindowRenderer::startNextFrame(). Once done, they are required to call back https://(). The example has no asynchronous command generation, so the frameReady() call is made directly from startNextFrame().
void VulkanRenderer::startNextFrame()
{
    m_green += 0.005f;
    if (m_green > 1.0f)
        m_green = 0.0f;

    VkClearColorValue clearColor = {{ 0.0f, m_green, 0.0f, 1.0f }};
    VkClearDepthStencilValue clearDS = { 1.0f, 0 };
    VkClearValue clearValues[2];
    memset(clearValues, 0, sizeof(clearValues));
    clearValues[0].color = clearColor;
    clearValues[1].depthStencil = clearDS;

    VkRenderPassBeginInfo rpBeginInfo;
    memset(&rpBeginInfo, 0, sizeof(rpBeginInfo));
    rpBeginInfo.sType = VK_STRUCTURE_TYPE_RENDER_PASS_BEGIN_INFO;
    rpBeginInfo.renderPass = m_window->defaultRenderPass();
    rpBeginInfo.framebuffer = m_window->currentFramebuffer();
    const QSize sz = m_window->swapChainImageSize();
    rpBeginInfo.renderArea.extent.width = sz.width();
    rpBeginInfo.renderArea.extent.height = sz.height();
    rpBeginInfo.clearValueCount = 2;
    rpBeginInfo.pClearValues = clearValues;
    VkCommandBuffer cmdBuf = m_window->currentCommandBuffer();
    m_devFuncs->vkCmdBeginRenderPass(cmdBuf, &rpBeginInfo, VK_SUBPASS_CONTENTS_INLINE);

    // Do nothing else. We will just clear to green, changing the component on
    // every invocation. This also helps verifying the rate to which the thread
    // is throttled to. (The elapsed time between startNextFrame calls should
    // typically be around 16 ms. Note that rendering is 2 frames ahead of what
    // is displayed.)

    m_devFuncs->vkCmdEndRenderPass(cmdBuf);

    m_window->frameReady();
    m_window->requestUpdate(); // render continuously, throttled by the presentation rate
}
To get continuous updates, the example simply invokes https://() in order to schedule a repaint.
Running the Example▲
To run the example from http://, open the Welcome mode and select the example from Examples. For more information, visit http://.
List of Files▲
Files:
List of Files▲
-
hellovulkanwindow/hellovulkanwindow.cpp
-
hellovulkanwindow/hellovulkanwindow.h
-
hellovulkanwindow/hellovulkanwindow.pro
-
hellovulkanwindow/main.cpp