Exporting Designs from Graphics Software
You can export designs from graphics software, such as Adobe Photoshop and GIMP, to QML files. Each scene is converted into a single QML file with an Image or a Text element for each layer and saved on the development PC. Top-level layer groups are converted into merged QML Image elements.
Note: GIMP does not support grouping, and therefore, each layer is exported as an item in GIMP.
You can open the QML file in Qt Creator for editing. If you edit the file in Adobe Photoshop and export it to the same directory again, any changes you made in Qt Creator are overwritten. However, you can re-export graphical assets without recreating the QML code.
If you create vector graphics with other tools that have an Adobe Photoshop export option, such as Adobe Illustrator, you can export them first to Photoshop and then to QML.
Conversion Rules
The following rules apply to the conversions:
- Layer names are used as element names. Spaces and hash marks (#) are replaced with underscore characters to create valid ids for the elements.
- Layer styles, such as drop shadows, are converted to images.
- Offset, size, ordering and opacity are preserved.
- Text layers are converted to Text elements, unless you specify that they be converted to Image elements.
- Hidden layers can be exported, and their visibility is set to hidden.
- PNG images are copied to the images subirectory.
Preparing Files for Conversion
To create QML files that are easy to use, prepare the Adobe Photoshop or GIMP designs for exporting, as follows:
- To minimize the number of elements, minimize the number of layers or use top-level layer groups, because each layer or layer group is exported as a Text or Image element.
- To make sure that all related elements are exported to the same element, use top-level layer groups.
- To determine that some layers are not exported, hide them, and deselect the Export hidden check box during exporting.
- To make it easier to find the layers and layer groups after exporting them, use descriptive names for them.
- To make sure that image dimensions are preserved during export, create at least one fully filled layer (which can be hidden), such as a background layer. If the export script does not find a fully filled layer, it resizes all images to the size of the canvas.
- To prevent errors during export, make sure that the layers are not locked. Locked layers cannot be exported.
- To avoid unexpected results, do not use Blending Mode effects. They are not exported.
Exporting from Adobe Photoshop to QML
The script has been tested to work on Adobe Photoshop CS 4 and 5, but it might also work on other versions.
- Download the export script, Export QML.jx, from Gitorious.
Note: Read the README.txt file in the repository for latest information about the script.
- Double-click the export script to add the export command to the Scripts menu. You can also copy the script file to the Adobe Photoshop scripts directory (typically, \Presets\Scripts in the Photoshop installation directory).
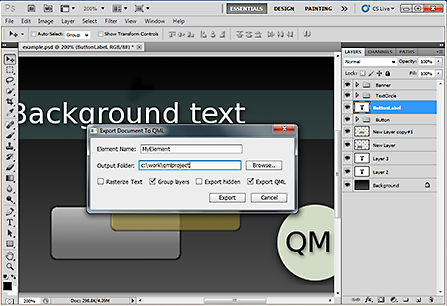
- In Adobe Photoshop, choose File > Scripts > Export to QML to export the scene to a QML file.
- In the Export Document to QML dialog, enter a name and location for the QML file.
- Select the Rasterize text check box to export text layers as images, not as Text elements.
- Select the Group layers check box to export each top-level group as a merged QML Image element.
- Select the Export hidden check box to export hidden layers and to set their visibility property to hidden.
- Deselect the Export QML check box if you have modified the QML document in Qt Creator, but still want to re-export graphical assets.
- Click Export.
The QML file is saved to the location that you specified. In Qt Creator, choose File > Open File or Project to open the QML file.
Note: Existing files are replaced without warning.
Exporting from GIMP to QML
The script has been tested to work on GIMP 2. You can download GIMP 2 from GIMP Downloads.
To use the export script on Microsoft Windows, you also need to install the GIMP Python extension (Python, PyCairo, PyGobject, PyGTK). However, GIMP is not officially supported on Windows, so we cannot guarantee that this will work.
- On Microsoft Windows, you must first add Python support to your GIMP installation, as instructed in Tutorial: Installing Python for GIMP 2.6 (Windows).
- Download the export script, qmlexporter.py, from Gitorious.
Note: Read the INSTALL.txt in the repository for latest information about the script.
- Copy the export script to the plug-ins directory in the GIMP installation directory.
- Check the properties of the file to make sure that it is executable.
On Linux, run the following command: chmod u+rx
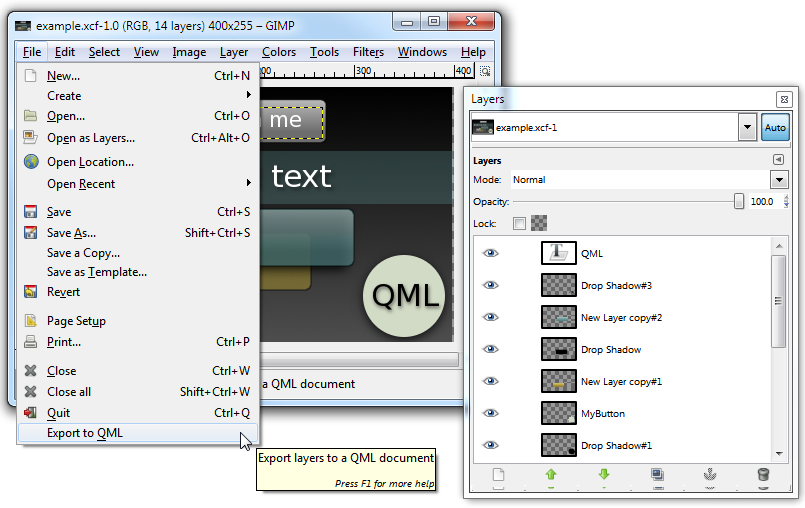
- Restart GIMP to have the export command added to the File menu.
- Choose File > Export to QML to export the design to a QML file.
- In the Export Layers to a QML Document dialog, enter a name and location for the QML file, and click Export.
The QML file is saved to the location that you specified. In Qt Creator, choose File > Open File or Project to open the QML file.
Note: Existing files are replaced without warning.
|


