Adding New Project Wizards
If you have a team working on a large application or several applications, you might want to standardize the way the team members create projects and classes.
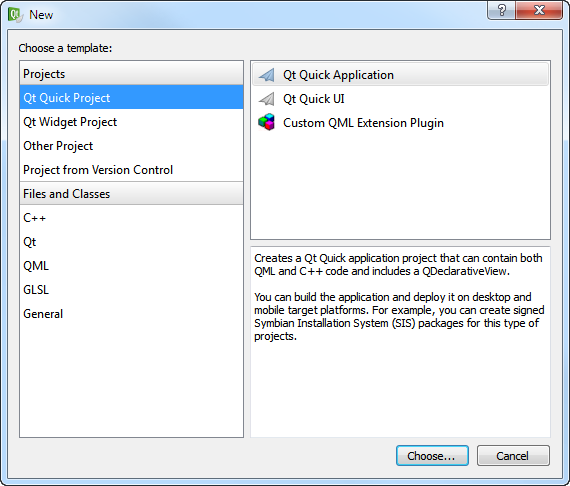
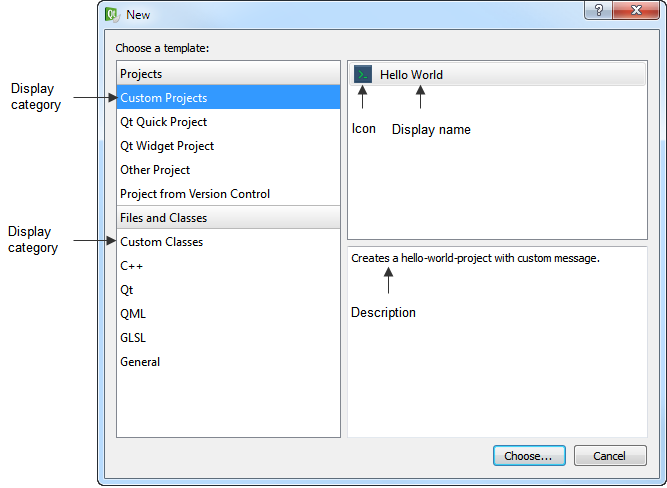
You can use the wizard templates in the share/qtcreator/templates/wizards folder to create your own project and class wizards. Qt Creator looks in the folder and adds all wizards defined in wizard.xml files to the New dialog that opens when you select File > New File or Project.
In a project wizard, you can specify the files needed in a project. You can add wizard pages to allow developers to specify settings for the projcet.
In a class wizard, you can allow developers to specify the class name, base class, and header and source files for the class.
To see how this works, rename wizard_example.xml as wizard.xml in the helloworld and listmodels folders. After you restart Qt Creator, the Custom Classes and Custom Projects categories appear in the New dialog.
Creating Project Wizards
To create a project wizard:
- Make a copy of the share/qtcreator/templates/wizards/helloworld or share/qtcreator/templates/wizards/listmodel folder.
- Modify the wizard_example.xml file.
- The following code determines the type of the wizard and its place in the New dialog:
 <wizard version="1" kind="project"
 class="qt4project" firstpage="10"
 id="A.HelloWorld" category="B.CustomProjects">
- version is the version of the file contents. Do not modify this value.
- kind specifies the type of the wizard: project or class.
- class specifies the type of the project. Currently the only available type is qt4project, which specifies a Qt console project.
- firstpage specifies the place of the new page in the standard project wizard. The value 10 ensures that the custom page appears after the standard pages, as the last page of the wizard.
- id is the unique identifier for your wizard. The letter specifies the position of the wizard within the category. The HelloWorld wizard appears as the first wizard in the second category in the New dialog.
- category is the category in which to place the wizard in the list. The letter specifies the position of the category in the list in the New dialog.
- The following code specifies the icon and text that appear in the New dialog:
 <icon>console.png</icon>
 <description>Creates a hello-world-project with custom message.</description>
 <description xml:lang="de">Erzeugt ein Hello-Welt-Projekt mit einer Nachricht.</description>
 <displayname>Hello World</displayname>;
 <displayname xml:lang="de">Hallo Welt</displayname>;
 <displaycategory>Custom Projects</displaycategory>
 <displaycategory xml:lang="de">Benutzerdefinierte Projekte</displaycategory>
- The following code specifies the files to add to the project:
 <files>
     <file source="main.cpp" openeditor="true" />
     <file source="project.pro" target="%ProjectName%.pro" openproject="true" />
- source specifies the file to copy to the project. The files must be located in the wizard folder.
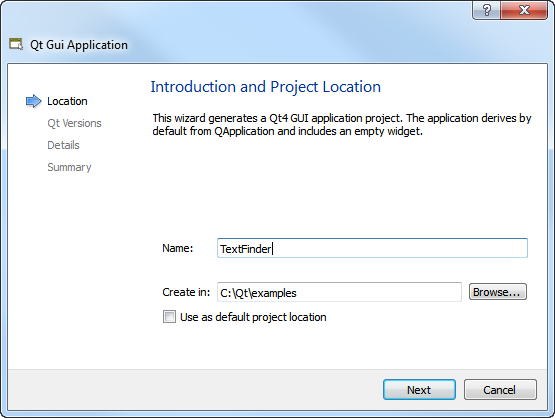
- target specifies the new filename for the file. The %ProjectName% variable is replaced with the string that users specify in the Name field on the first page of the wizard.
- openproject indicates that the file is a project file which is to be opened after the wizard has finished.
- openeditor indicates that the file is to be opened in an editor after the wizard has finished.
- The following code creates a page that specifies settings for the project:
 <!-- Create a 2nd wizard page with parameters -->
 <fieldpagetitle>Hello World Parameters</fieldpagetitle>
 <fieldpagetitle xml:lang="de">Hallo Welt Parameter</fieldpagetitle>
 <fields>
     <field mandatory="true" name="MESSAGE">
         <fieldcontrol class="QLineEdit" validator='^[^"]+$'  defaulttext="Hello world!" />
         <fielddescription>Hello world message:</fielddescription>
         <fielddescription xml:lang="de">Hallo-Welt-Nachricht:</fielddescription>
     </field>
 </fields>
- fieldpagetitle specifies the title of the page.
- field specifies whether the field is mandatory (true or false). You can use the value of the name field as a variable in other files (for example, %MESSAGE%.
- fieldcontrol specifies the field. class specifies the field type. You can use interface objects from the QWidget class to create fields. This example uses QLineEdit to create an input field.
- validator specifies a regular expression to check the characters allowed in the field.
- defaulttext specifies text that appears in the field by default.
- fielddescription specifies the field name that appears on the wizard page.
Creating Class Wizards
The widget.xml file for a class wizard is very similar to that for a project wizard. The differences are discussed below.
To create a class wizard:
- The following code specifies settings for the wizard:
 <wizard version="1" kind="class" id="A.ListModel" category="B.CustomClasses">

    <description>Creates a QAbstractListModel implementation.</description>
    <description xml:lang="de">Erzeugt eine Implementierung von QAbstractListModel.</description>

    <displayname>QAbstractListModel implementation</displayname>
    <displayname xml:lang="de">Implementierung von QAbstractListModel</displayname>

    <displaycategory>Custom Classes</displaycategory>
    <displaycategory xml:lang="de">Benutzerdefinierte Klassen</displaycategory>
For more information about the elements and their values, see Creating Project Wizards.
- The following code specifies the files to add to the project:
 <files>
     <file source="listmodel.cpp" target="%ClassName:l%.%CppSourceSuffix%"  openeditor="true" />
     <file source="listmodel.h" target="%ClassName:l%.%CppHeaderSuffix%"  openeditor="true" />
 </files>
Here, target contains the following variables that are used to construct the filename:
- %ClassName:l% is replaced with the value of the ClassName field. The modifier l converts the string to lower case, to observe Qt conventions.
- %CppSourceSuffix% is replaced by the default source suffix, which is defined in Qt Creator in Tools > Options... > C++ > File Naming. For example, if users enter MyClass, the filename becomes myclass.cpp when the project is created.
- %CppHeaderSuffix% is replaced by the default header suffix, which is also defined in File Naming. Here, the filename would become myclass.h.
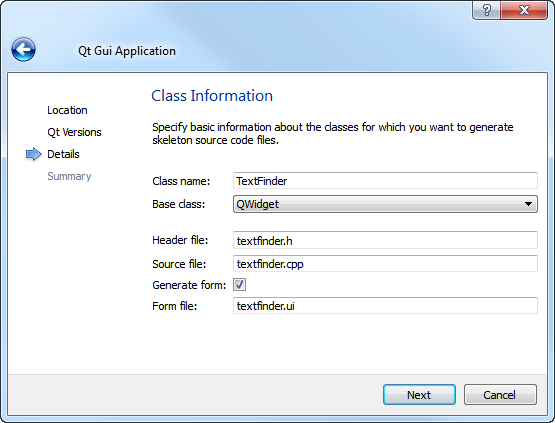
- The following code creates a page that allows users to select the class name, base class, and header and source files for the class:
 <!-- Create parameter wizard page -->

 <fieldpagetitle>ListModel parameters</fieldpagetitle>
 <fieldpagetitle xml:lang="de">Parameter des ListModel</fieldpagetitle>
 <fields>
     <field name="ClassName">

         <fieldcontrol class="QLineEdit" validator="^[a-zA-Z0-9_]+$" defaulttext="MyListModel" />

         <fielddescription>Class name:</fielddescription>
         <fielddescription xml:lang="de">Klassenname:</fielddescription>
     </field>
     <field name="Datatype">

         <fieldcontrol class="QComboBox" combochoices="QString,int" defaultindex="0" />

         <fielddescription>Data type:</fielddescription>
         <fielddescription xml:lang="de">Datentyp:</fielddescription>
     </field>
 </fields>
In addition to QLineEdit, QComboBox is used in the class wizard to create a field. combochoices specifies the options in the combobox and defaultindex specifies that QString is the default value.