Creating the Project
- Select File > New File or Project > Qt Quick Project > Qt Quick Application > Choose.
- Follow the instructions of the wizard to create a project called Transitions.
- Press Ctrl+R to run the application.
Qt Creator generates a default QML file that you can modify to create the main view of the application.
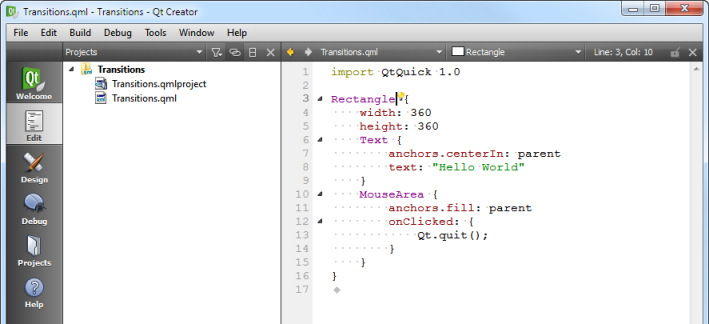
Creating the Main View
The main view of the application displays a Qt logo in the top left corner of the screen and two empty rectangles.
To use the states.png image in your application, you must copy it to the project directory (same subdirectory as the QML file) from the examples directory in the Qt installation directory. For example: C:\QtSDK\Examples\4.7\declarative\animation\states. The image appears in the Resources pane. You can also use any other image or a QML element, instead.
- In the Projects view, double-click the main.qml file to open it in the code editor.
- Click Design to open the file in Qt Quick Designer.
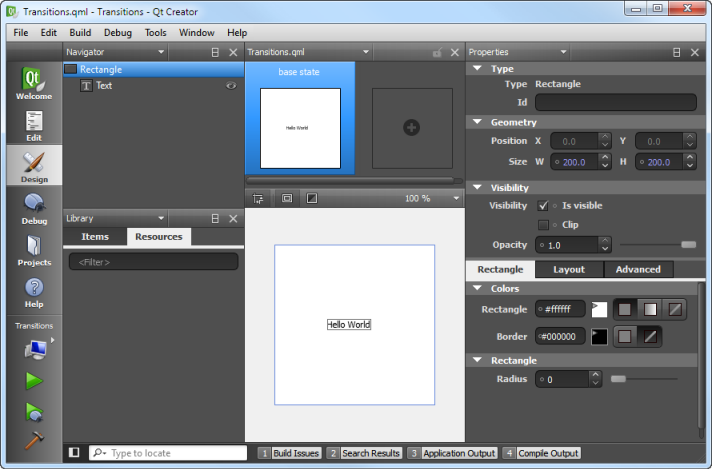
- In the Navigator pane, select Text and press Delete to delete it.
- Select Rectangle to edit its properties.
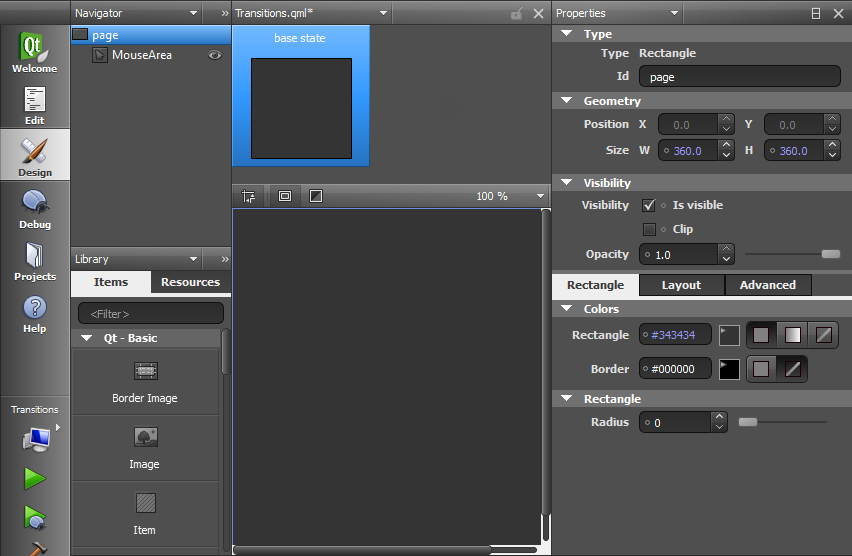
- In the Id field, enter page, to be able to reference the rectangle from other places.
- In the Colors group, Rectangle field, set the color to #343434.
- In the Library view, Resources tab, select states.png and drag and drop it to the canvas.
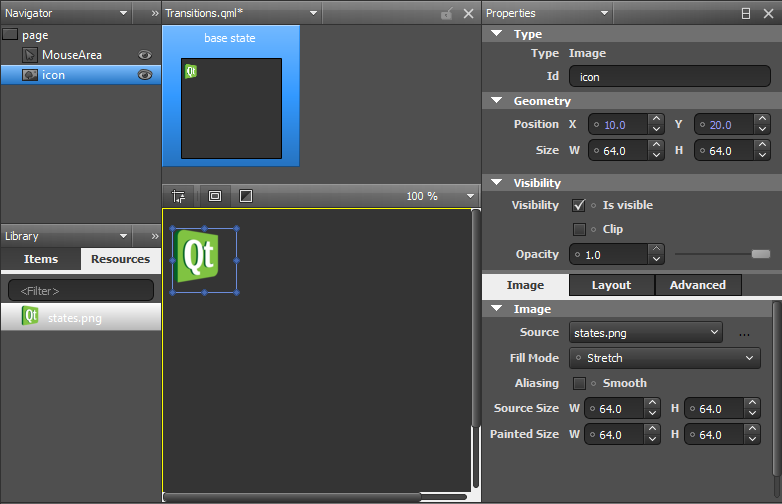
- In the Id field, enter icon.
- In the Position field, set X to 10 and Y to 20.
- In the Library view, Items tab, select Rectangle, drag and drop it to the canvas, and edit its properties.
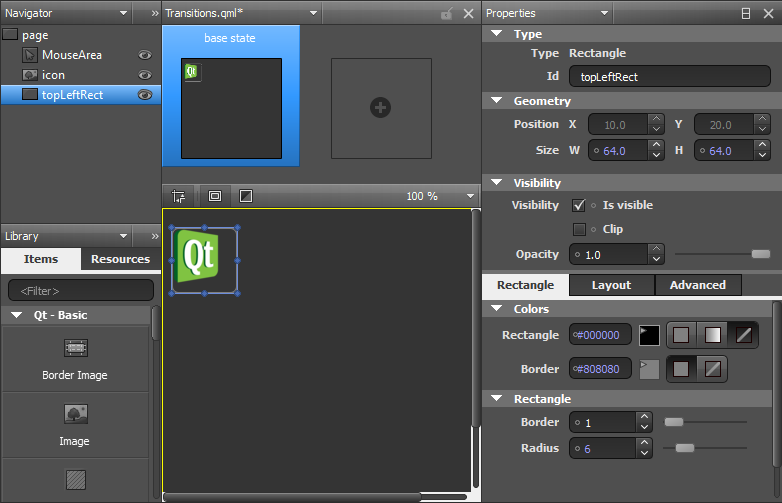
- In the Id field, enter topLeftRect.
- In the Size field, set W and H to 64, for the rectangle size to match the image size.
- In the Colors group, Rectangle field, click the
 button to make the rectangle transparent.
- In the Border field, set the border color to #808080.
- In the Rectangle group, Border field, set the border width to 1.
Note: If the Border field does not appear after you set the border color, try setting the border color to solid by clicking the  button.
- In the Radius field, select 6 to create rounded corners for the rectangle.
- Click Layout, and then click the top and left anchor buttons to anchor the rectangle to the top left corner of the page.
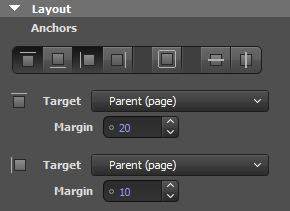
- In the Margin field, select 20 for the top anchor and 10 for the left anchor.
- In the Navigator pane, drag and drop the Mouse Area element from page to topLeftRect to make it apply only to the rectangle and not to the whole page.
- Edit Mouse Area properties:
- Click Layout, and then click the
 button to anchor the mouse area to the rectangle.
- In the code editor, edit the pointer to the clicked expression in the mouse area element, as illustrated by the following code snippet:
 MouseArea {
     anchors.fill: parent
     onClicked: page.state = ''
 }
The expression sets the state to the base state and returns the image to its initial position.
- In the Navigator pane, copy topLeftRect (by pressing Ctrl+C) and paste it to the canvas twice (by pressing Ctrl+V). Qt Creator renames the new instances of the element topLeftRect1 and topLeftRect2.
- Select topLeftRect1 and edit its properties:
- In the Id field, enter middleRightRect.
- In Layout, select the vertical center anchor button and then the right anchor button to anchor the rectangle to the middle right margin of the screen.
- In the Margin field, select 10 for the right anchor and 0 for the vertical center anchor.
- In the code editor,add a pointer to a clicked expression to the mouse area element. The following expression sets the state to State1:
onClicked: page.state = 'State1'
You will create State1 later.
- Select topLeftRect2 and edit its properties:
- In the Id field, enter bottomLeftRect.
- In Layout, select the bottom and left anchor buttons to anchor the rectangle to the bottom left margin of the screen.
- In the Margin field, select 20 for the bottom anchor and 10 for the left anchor.
- In the code editor, add a pointer to a clicked expression to the mouse area element. The following expression sets the state to State2:
onClicked: page.state = 'State2'
You will create State2 later.
- Press Ctrl+S to save the changes.
- Press Ctrl+R to run the application.
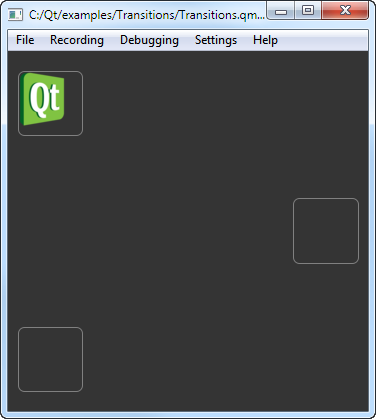
You should see the Qt logo in the top left rectangle, and two additional rectangles in the center right and bottom left of the screen.
You can now create additional states to add views to the application.
Adding Views
In the .qml file, you already created pointers to two additional states: State1 and State2. To create the states:
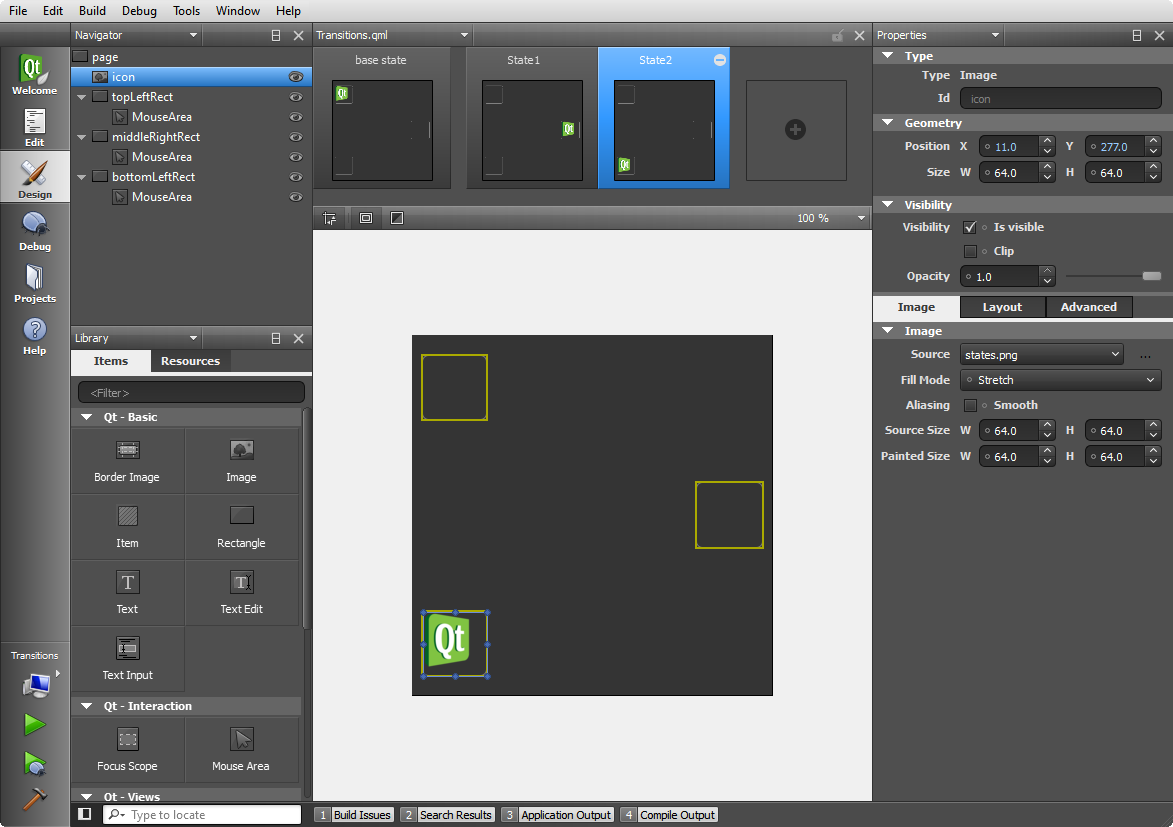
- Click the empty slot in the States pane to create State1.
- Click the empty slot in the States pane to create State2.
- In the code editor, bind the position of the Qt logo to the rectangle to make sure that the logo is displayed within the rectangle when the view is scaled on different sizes of screens. Set expressions for the x and y properties, as illustrated by the following code snippet:
 states: [
     State {
         name: "State1"

         PropertyChanges {
             target: icon
             x: middleRightRect.x
             y: middleRightRect.y
         }
     },
     State {
         name: "State2"

         PropertyChanges {
             target: icon
             x: bottomLeftRect.x
             y: bottomLeftRect.y
         }
     }
 ]
Note: When you set the expressions, drag and drop is disabled for the icon in Qt Quick Designer.
- Press Ctrl+R to run the application.
Click the rectangles to move the Qt logo from one rectangle to another.
Adding Animation to the View
Add transitions to define how the properties change when the Qt logo moves between states. The transitions apply animations to the Qt logo. For example, the Qt logo bounces back when it moves to the middleRightRect and eases into bottomLeftRect. Add the transitions in the code editor.
- In the code editor, add the following code to specify that when moving to State1, the x and y coordinates of the Qt logo change linearly over a duration of 1 second:
     Transition {
         from: "*"; to: "State1"
         NumberAnimation {
             properties: "x,y";
             duration: 1000
         }
     },
- You can use the Qt Quick toolbar for animation to change the easing curve type from linear to OutBounce:
- Click NumberAnimation in the code editor to display the
 icon, and then click the icon to open the toolbar:
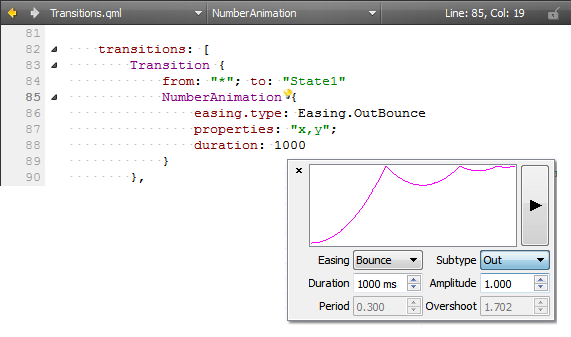
- In the Easing field, select Bounce.
- In the Subtype field, select Out.
- Add the following code to specify that when moving to State2, the x and y coordinates of the Qt logo change over a duration of 2 seconds, and an InOutQuad easing function is used:
     Transition {
         from: "*"; to: "State2"
         NumberAnimation {
             properties: "x,y";
             easing.type: Easing.InOutQuad;
             duration: 2000
         }
     },
- Add the following code to specify that for any other state changes, the x and y coordinates of the Qt logo change linearly over a duration of 200 milliseconds:
     Transition {
         NumberAnimation {
             properties: "x,y";
             duration: 200
         }
     }
 ]
- Press Ctrl+R to run the application.
Click the rectangles to view the animated transitions.


