


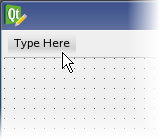
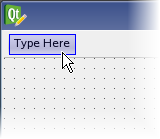
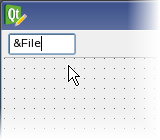
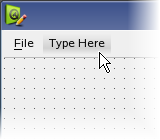
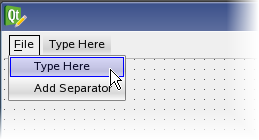
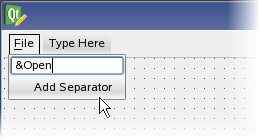
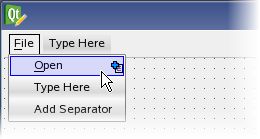
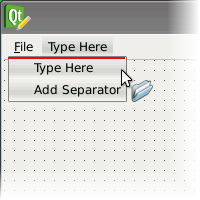
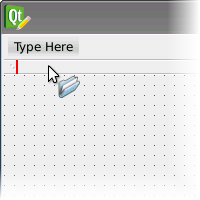
Creating Main Windows in Qt DesignerQt Designer can be used to create user interfaces for different purposes, and provides different kinds of form templates for each of these. The main window template is used to create application windows with menu bars, toolbars, and dock widgets. The Main Window TemplateCreate a new main window by opening the File menu and select the New Form... option, or by pressing Ctrl+N.. Then select the Main Window template. The template provides a main application window which contains a menu bar and a toolbar by default; these can be removed if they are not required. If you remove the menu bar, a new one can be created by selecting the Create Menu Bar option from the context menu, obtained by right-clicking within the main window form. An application can only have one menu bar, but several toolbars can be added. MenusMenus are added to the menu bar by modifying the Type Here placeholders. One of these is always present for editing purposes, and will not be displayed in the preview or in the finished window. Once created, the properties of a menu can be accessed using the Property Editor, and each menu can be accessed for this purpose via the The Object Inspector. Existing menus can be removed by opening a context menu over the label in the menu bar, and selecting Remove Menu 'menu_name'.
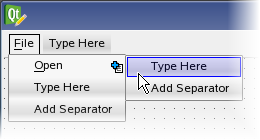
Menus can also be rearranged in the menu bar with simple drag and drop operations. Simply click and drag the menu you want to move, and drop it in the required location. A vertical red line indicates the position where the menu will be inserted. Menus can contain any number of entries and separators, and can be nested to the required depth. Adding new entries to menus can be achieved by navigating the menu structure in the usual way.
Just as with menus, entries can be moved around using drag and drop operations. When an entry is dragged over a closed menu, the menu will open to allow it to be inserted there. Since menu entries are based on actions, they can also be dropped onto toolbars, where they will be displayed as toolbar buttons. ToolbarsToolbars are added to a main window in a similar way to the menu bar: Select the Add Tool Bar option from the form's context menu. Alternatively, if there is an existing toolbar in the main window, you can click the arrow at its right-hand end to create a new toolbar. Toolbar buttons are created by using the action system to populate each toolbar, rather than by using specific button widgets from the widget box. Since actions can be represented by menu entries and toolbar buttons, they can be moved between menus and toolbars. To share an action between a menu and a toolbar, drag its icon from the Action Editor to the toolbar rather than from the menu where its entry is located. New actions for menus and toolbars can be created in the Action Editor. ActionsWith the menu bar and the toolbars in place, it's time to populate them with actions: Qt Designer provides an action editor to simplify the creation and management of actions.
To create an action, use the action editor's New button which will pop up an input dialog. Provide the new action with a Text. This is the text that will appear in a menu entry and as the actions tooltip. The text is also automatically added to an "action" prefix creating the action's Object Name. In addition, the dialog provides the option of selecting an Icon for the action, as well as removing the current icon. Once the action is created, it can be used wherever actions are applicable.
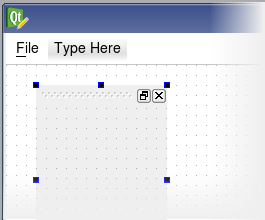
Dock WidgetsSince dock widgets are container widgets, they can be added to a form in the usual way. When added to a form, dock widgets are not placed in any particular dock area by default; you need to set the docked property to true for each widget and choose an appropriate value for its dockWidgetArea property.
[Previous: Using Containers in Qt Designer] [Contents] [Next: Qt Designer's Signals and Slots Editing Mode] |
Publicité
Best OfActualités les plus luesSemaine
Mois
Année

Le Qt Developer Network au hasard
Utiliser QML et QtWebKit avec PySideLe Qt Developer Network est un réseau de développeurs Qt anglophone, où ils peuvent partager leur expérience sur le framework. Lire l'article.
CommunautéRessources
Liens utilesContact
Qt dans le magazine |

| Cette page est une traduction d'une page de la documentation de Qt, écrite par Nokia Corporation and/or its subsidiary(-ies). Les éventuels problèmes résultant d'une mauvaise traduction ne sont pas imputables à Nokia. | Qt 4.2 | |
| Copyright © 2012 Developpez LLC. Tous droits réservés Developpez LLC. Aucune reproduction, même partielle, ne peut être faite de ce site et de l'ensemble de son contenu : textes, documents et images sans l'autorisation expresse de Developpez LLC. Sinon, vous encourez selon la loi jusqu'à 3 ans de prison et jusqu'à 300 000 E de dommages et intérêts. Cette page est déposée à la SACD. | ||
| Vous avez déniché une erreur ? Un bug ? Une redirection cassée ? Ou tout autre problème, quel qu'il soit ? Ou bien vous désirez participer à ce projet de traduction ? N'hésitez pas à nous contacter ou par MP ! | ||
Copyright © 2000-2012 - www.developpez.com