Creating a Qt Quick Application Using Qt Quick Components
Note: To complete this tutorial, you must install the Qt Quick Components for Symbian and the Symbian^3 tool chain as part of the Qt SDK. In addition, you must install the Qt Quick Components on the test device.
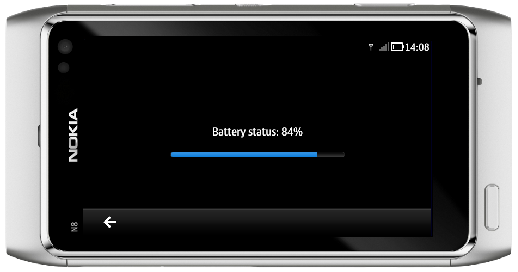
This tutorial describes how to use Qt Creator to create a small Qt application, Battery Status, that uses the System Information Mobility API to fetch battery information from the device.

The user interface for the application is designed using Qt Quick Components for Symbian. This enforces a platform look and feel for Symbian^3 devices.
Creating the Project
- Select File > New File or Project > Qt Quick Project > Qt Quick Application > Choose.
- In the Name field, type BatteryStatus.
- In the Create in field, enter the path for the project files. For example, C:\Qt\examples, and then click Next.
- In the Application Type dialog, select Qt Quick Components (Symbian Applications), and then click Next.
- Select Symbian Device and Qt Simulator targets, and then click Next.
Note: Targets are listed if you installed the appropriate development environment, for example, as part of the Qt SDK. You can add targets later in the Projects mode.
- Select Next in the following dialogs to use the default settings.
Note: Qt Creator contains a default program icon and generates an Application UID, for testing the application on a device. You only need to change the icon and UID if you deliver the application for public use.
- Review the project settings, and click Finish to create the project.
Qt Creator generates the necessary files that contain boiler plate code. The wizard creates an application that uses page-based application navigation.
Modify the files as described in the following sections.
Declaring the Qt Mobility API
To use the Qt Mobility APIs or develop applications for Symbian devices, you must modify the .pro file to declare the Qt Mobility APIs that you use.
This example uses the System Info API, so you must declare it, as illustrated by the following code snippet:
 CONFIG += mobility
 MOBILITY = systeminfo
Each Mobility API has its corresponding value that you have to add as a value of MOBILITY to use the API. For a list of the APIs and the corresponding values that you can assign to MOBILITY, see the Quickstart Example.
Adding Import Statements
The wizard adds the import statements for Qt Quick and the Qt Quick Components for Symbian to the MainPage.qml file:
 import QtQuick 1.0
 import com.nokia.symbian 1.0
To use the Qt Mobility APIs, you must add the import statements for the Qt Mobility APIs that you use. This example uses the System Info API, so you must import it, as illustrated by the following code snippet:
import QtMobility.systeminfo 1.1
Use the values as you can assign to MOBILITY also to construct import statements.
Creating the Main View
Qt Creator generates a default QML file that you can modify to create the main view of the application. It displays a progress bar and a text label that indicate the battery status.
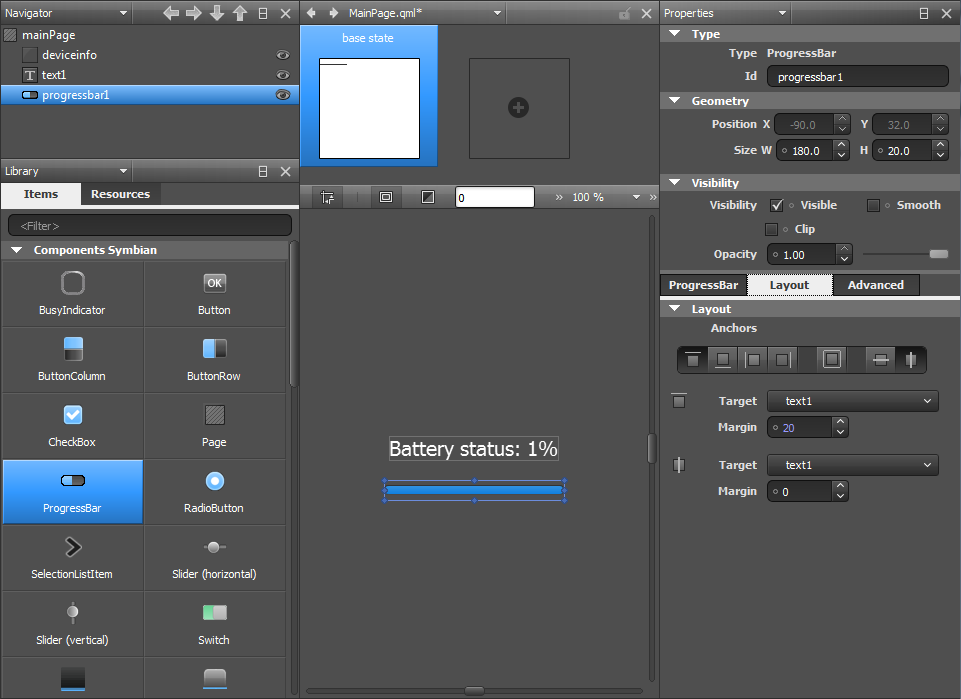
- Click Design to open MainPage.qml in Qt Quick Designer.
- In the Navigator pane, select the Text element to edit its properties in the Properties pane.
- In the Text field, change the text from Hello World! to Battery status: 1%.
- In the Library view, Items tab, select the ProgressBar element, drag and drop it to the canvas, and edit its properties.

- Click Layout, and then click the top anchor button.
- In the Target field, select text1, to anchor the progress bar to the bottom of the text field.
- In the Margin field, select 20.
- Click the horizontal anchor button, and select text1 in the Target field to anchor the progress bar horizontally to the text field.
- To check that the application can be built and run, select Qt Simulator as the target and click the
 button. button.
Fetching Battery Status
To fetch the battery status, open MainPage.qml in the code editor and add some code to it:
- Add an invisible DeviceInfo element that contains two signals. The onCompleted signal starts battery level notification when the component is initialized. The batteryLevelChanged signal is called when the battery level changes.
 Page {
     id: mainPage

     DeviceInfo {
         id: deviceinfo

         Component.onCompleted: {
             deviceinfo.startBatteryLevelChanged();
         }
         onBatteryLevelChanged: {
              progressbar1.value = batteryLevel
          }
     }
- Set an expression as the value of the text property of the Text element to display the battery level as a percentage:
     Text {
         id: text1
         x: 0
         color: platformStyle.colorNormalLight
         text: qsTr("Battery status: %1%").arg(progressbar1.value)
         anchors.horizontalCenter: parent.horizontalCenter
         anchors.verticalCenter: parent.verticalCenter
         font.pixelSize: 20
     }
- Set values for the ProgressBar element to display the battery level on the progress bar:
     ProgressBar {
         id: progressbar1
         anchors.horizontalCenter: text1.horizontalCenter
         anchors.top: text1.bottom
         anchors.topMargin: 20
         minimumValue: 0
         maximumValue: 100
         value: deviceinfo.batteryLevel
     }
Compiling and Running Your Program
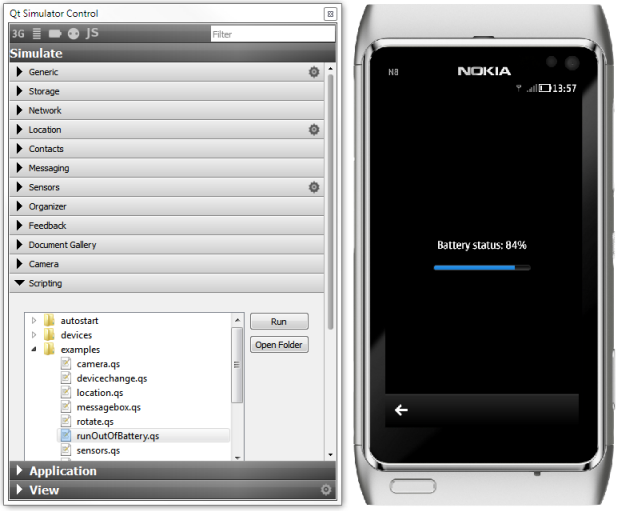
Now that you have all the necessary code, select Qt Simulator as the target and click the  button to build your program and run it in the Qt Simulator. button to build your program and run it in the Qt Simulator.
In Qt Simulator, run the runOutOfBattery.qs example script to see the value change in the Battery Status application. Select Scripting > examples > runOutOfBattery.qs > Run Selected Script.

Testing on a Symbian Device
You also need to test the application on real devices. Before you can start testing on Symbian devices, you must connect them to the development PC by using a USB cable and install the necessary software on them.
- Install Qt libraries, Qt mobile libraries, Qt Quick components for Symbian, and a debugging agent on the device. For more information, see Connecting Symbian Devices.
- Start the CODA debugging agent on the device.
- Click the Target Selector and select Symbian Device.
- Click Run to build the application for the Symbian device.
|


 button.